
This guide gives step-by-step instructions for accessing SCINet systems via SSH, which allows you to connect to SCINet systems via the command-line terminal. Please note that for most use cases, you do not need to do this! We recommend Open OnDemand as a simpler, more versatile alternative to SSH.
If you do wish to access SCINet systems via SSH, you will need to have software called “SmallStepCLI” installed on your computer. The instructions below detail how to install and configure SmallStepCLI and use it for SSH access to SCINet systems.
If you are a LincPass User and still encountering errors after completing the below steps, see SmallStepCLI Install Troubleshooting for LincPass Users
Small Step Installation Instructions
Windows Instructions
- OpenSSH needs to be installed. If you have Windows 10 or later, you should already have OpenSSH unless your local admin has removed it or restricted access to it. Check by running
sshin a PowerShell or terminal window. If it works, you should see usage instructions. - Installing SmallStepsCLI:
- If you are on a USDA-managed Windows laptop or workstation:
- If your workstation has CEC support, you can install SmallStepsCLI directly from the Software Center. If Software Center fails to install SmallStepCLI, please contact your IT Specialist prior to continuing.
- If you are encountering errors after completing the install, see SmallStepCLI Install Troubleshooting for LincPass Users.
- After installing, you may need to restart your terminal.
- If your workstation has “status quo” support (i.e., without CEC support), you will need to have your local IT Specialist install the software for you.
- If your workstation has CEC support, you can install SmallStepsCLI directly from the Software Center. If Software Center fails to install SmallStepCLI, please contact your IT Specialist prior to continuing.
- If you are not on a USDA-managed laptop:
- ssh-agent needs to to running as a system service. If it is not running, SmallStepCLI will not work. Please verify that it is running before proceeding.
-
Open a PowerShell window and run
Get-Service ssh-agentIf the status is “Running”, you are ready to install SmallStepCLI. If not, you will need an administrator to enable the ssh-agent system service. The administrator must:
-
Open a PowerShell Window as an administrator (right click on the program and select “Run as Administrator”).
Get-Service ssh-agent | Set-Service -StartupType Automatic -
Start the service
Start-Service ssh-agent
-
-
- If you have admin rights on your computer, you can install the software yourself. See: SmallStep Windows Instructions. For Windows, we recommend the winget installer.
- If you do not have admin rights on your computer, you will need to ask your IT support for help installing the software.
- ssh-agent needs to to running as a system service. If it is not running, SmallStepCLI will not work. Please verify that it is running before proceeding.
- If you are on a USDA-managed Windows laptop or workstation:
Once your Step installation is complete, see After Step Installation.
Mac Instructions
- For MacOS the instrcutions are more straightforward and can be done by the user without admin access. To do so, see: SmallStep Mac Instructions.
- Please Note Homebrew will need to be installed first. There is a link to install it at the link above. It is the first step before installing Step.
Once your Step installation is complete, see After Step Installation.
Linux Instructions
- Linux will require root/sudo if you want to use the system package manager (e.g., rpm, deb, apt, pacman). Installation can also be done in userspace if you download the binary directly.
- To install SmallStep, see the Linux Instructions.
Once your Step installation is complete, see After Step Installation.
After Small Step Installation:
-
Open a Terminal, CMD shell, or PowerShell window and run the following:
step ca bootstrap --ca-url https://step-ca.scinet.usda.gov --fingerprint adb703fd18f176937743b20228d52af7a705d63a0471cd67428660be5fd006bfstep ssh config --set Provisioner=keycloak --set User=user.name- Be sure to change “user.name” to your own SCINet username
- Windows Users Only: If the step config command fails, ssh-agent probably isn’t running. See the Windows instructions above.
These commands will do the following:
- Gets the initial cert from the certificate authority.
- Sets up your ssh profile to simplify future logins
These commands only need to be run once. The second command updates your .ssh/config file. If you already have a custom config file, you may wish to review it after running this command. The changes are fine for most, but there could be conflicts, particularly if you already have SCINet-related entries in your config file.
SSH Access After Small Step Installation:
-
The first time you ssh to Ceres with
ssh user.name@ceres.scinet.usda.govor Atlas withssh user.name@atlas-login.hpc.msstate.edu, (changing “user.name” to your own SCINet username), your default web browser should open automatically to the USDA eAuthentication login page:
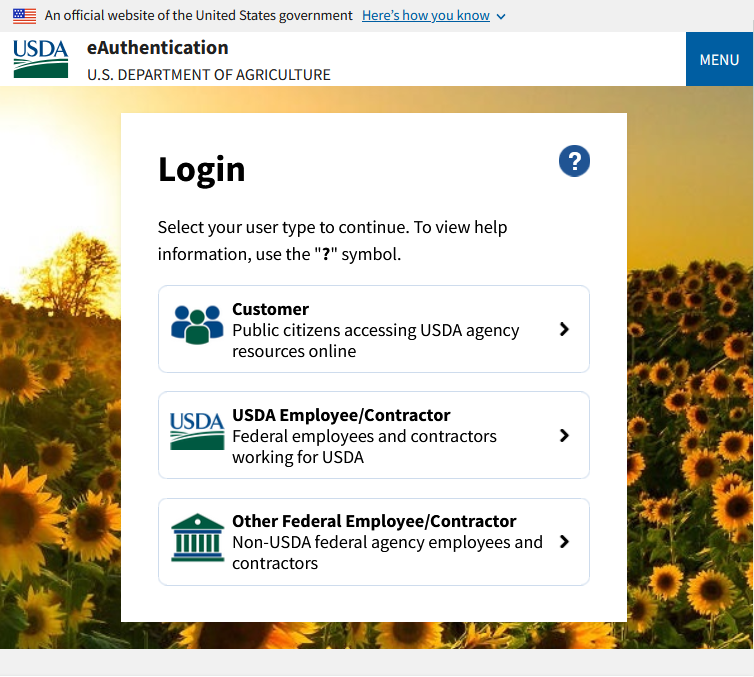
- Select the login option that is appropriate for you (Sponsored, non-USDA SCINet users should choose “Customer”):
- If you have a LincPass/AltLinc, you will authenticate as usual with eAuth.
- If you do not have a LincPass/AltLinc:
- Sponsored, non-USDA SCINet users will authenticate using Login.gov. Please see the detailed instructions for logging on to SCINet using Login.gov.
- USDA employees without a LincPass/AltLinc should enroll in Windows Hello for Business or apply for a PIV Exemption. More detailed information is available in the Alternative Login guide.
- Return to your shell and you should see “CA: https://step-ca.scinet.usda.gov” followed by your regular login.
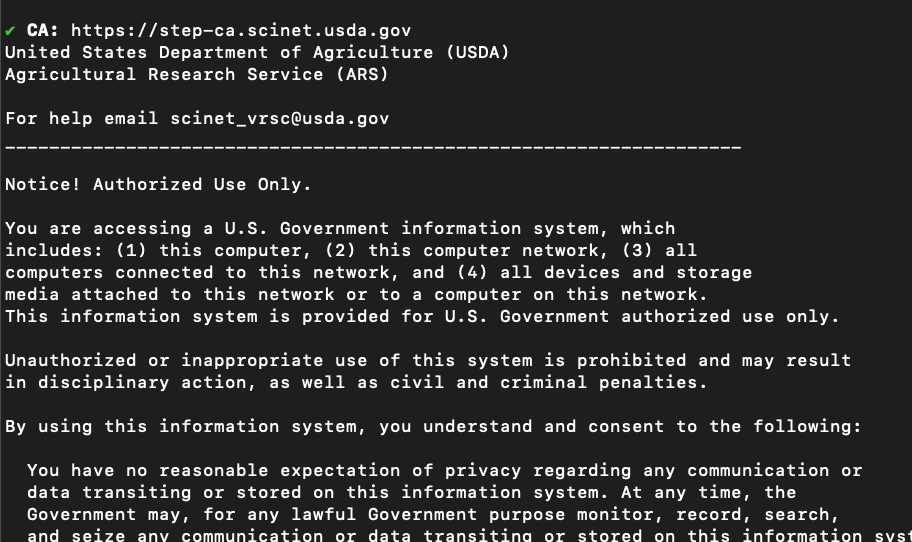
After these steps, command line ssh should work normally. You will only need to authenticate once for the day (or every 16 hours).
Notes and Limitations
Key warnings when connecting to Ceres or Atlas
When connecting to Ceres or Atlas via SSH, you may receive a warning about changed SSH keys if the host keys on Ceres or Atlas change (this sometimes happens during routine system maintenance). If you encounter this warning, you can either:
- Delete the file
.ssh/known_hostsin your home directory on your local machine; or - Remove local keys for specific systems by running
ssh-keygen -R HOSTNAMEwhere “HOSTNAME” is one of ceres.scinet.usda.gov, atlas-login.hpc.msstate.edu, atlas-login-1.hpc.msstate.edu, or atlas-login-2.hpc.msstate.edu.
After removing the problematic keys, try connecting again via SSH.
Other notes
- If you use multiple profiles in Chrome, step will open a new window in whichever profile was used last. If you end up in the wrong one, close that profile, do something in your work profile, and rerun the ssh login command.
- Windows users will find most tools other than the built-in windows ssh command line tools no longer work.
- Mac and Linux users may have a bit more luck, but anything beyond command line tools probably won’t work.
If you have any questions or issues, please contact the VRSC at scinet_vrsc@usda.gov.
Creating a Configuration File
If you would like more control over the details of your SSH connections to SCINet, you can create a custom SSH configuration file. This is completely optional and not required to access SCINet systems via SSH! You may create this file using Notepad or any other text editor. The file you create must be titled “config” with no extension for this method to work properly (i.e., “config” not “config.txt”). The example below will send a “keepalive” signal every 20 seconds and keep retrying for up to 30 failures. Note: Do not copy the code into the terminal itself, it must be in a separate file.
Create a ~/.ssh/config file replacing USER.NAME with your actual username, all in lowercase. The path to the .ssh file is as follows: C>Users>(Your Account)>.ssh
Note: If you are using a Mac, the .ssh file may be hidden to you. To reveal the hidden files, you will press and hold CMD+SHIFT+. (Period Key) when choosing a location to save your file. The .ssh file will now be visible for you to save the config file.
Host ceres-login ceres ceres.scinet.usda.gov
HostName ceres.scinet.usda.gov
User USER.NAME

Host atlas-login atlas atlas-login.hpc.msstate.edu
HostName atlas-login.hpc.msstate.edu
User USER.NAME

Host *
TCPKeepAlive yes
ServerAliveInterval 20
ServerAliveCountMax 30
ForwardAgent yes
Once you have SmallStep installed and properly configured, you will notice that something similar to the following has been added automatically. Do not remove this portion once it is in your config file.
# autogenerated by step @ 2024-06-26T15:09:22Z
Host *
	Include "/Users/User.Name/.step/ssh/includes"
# end
You can provide the same information to the ssh command via command-line arguments, if you prefer. In the examples below, replace USER.NAME with your actual username, all in lowercase.
ssh -o TCPKeepAlive=yes -o ServerAliveInterval=20 -o ServerAliveCountMax=30 USER.NAME@ceres.scinet.usda.gov
and
ssh -o TCPKeepAlive=yes -o ServerAliveInterval=20 -o ServerAliveCountMax=30 USER.NAME@atlas-login.hpc.msstate.edu