Galaxy is an open-source, web-based platform widely used in bioinformatics for data analysis and workflow management. Users are able to upload and manage data, launch a variety of bioinformatics tools, build and reuse workflows and track steps of analyses including parameters in histories. Histories make it easy to reproduce results and share analyses with collaborators and with bioinformatic support should the need arise.
Benefits of using Galaxy on SCINet
- Galaxy provides a friendly, web-based interface for working with your biological sequence data.
- Galaxy supports creating and saving workflows that make it easy to share and reuse complex bioinformatics pipelines.
- Galaxy provides a graphical environment for defining and editing workflows.
- SCINet hosts Galaxy on Ceres, one of our high-performance computing clusters and makes use of its parallel processing power. This allows for faster processing and analyses of large datasets.
- Data stored on Ceres can be easily transferred to Galaxy via secure FTP and Globus.
- SCINet users can collaborate
There is plenty of external documentation covering almost all conventional bioinformatic analyses. In fact, many workflows (see below) probably already exist that you can use directly on your data. Most commonly used bioinformatics tools are available in Galaxy, but if you do not see a tool in the current interface, it can often be installed from the Toolshed. You can then request that an administrator install it.
In order to use SCINet Galaxy, you need an account on Ceres. Click here to sign up for a SCINet account to start that process. New accounts will automatically get a Galaxy user name and directory with a default storage limit of 100 GB.
NOTE: All uploaded and output files are removed after 90 Days so it is recommended users save their data outside of galaxy.
Logging on
Ceres Galaxy is public facing, so to access it you just type or paste “https://galaxy.scinet.usda.gov” into the address bar of a web browser. We recommend Firefox, Chrome, or Safari. Make sure to type the “https://” prefix and note the “s”.
You will be presented with the following login screen:
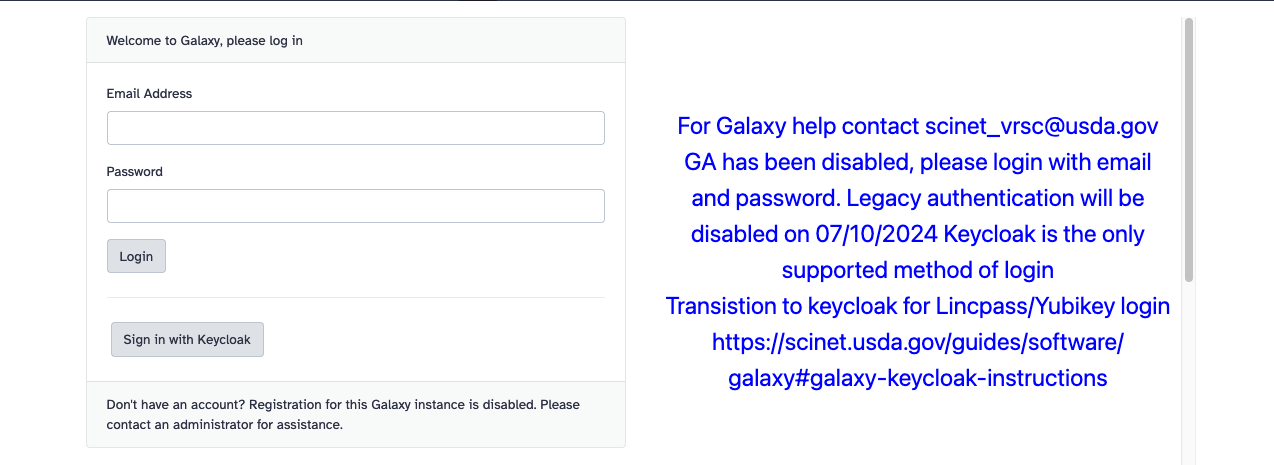
Click on “Sign in with Keycloak.” You will be presented with the USDA eAuthentication login page. Follow the Login.gov/LincPass login appropriate for you. For more information, see the Accessing web-based interfaces instructions.
After logging in, the standard Galaxy home screen should appear:
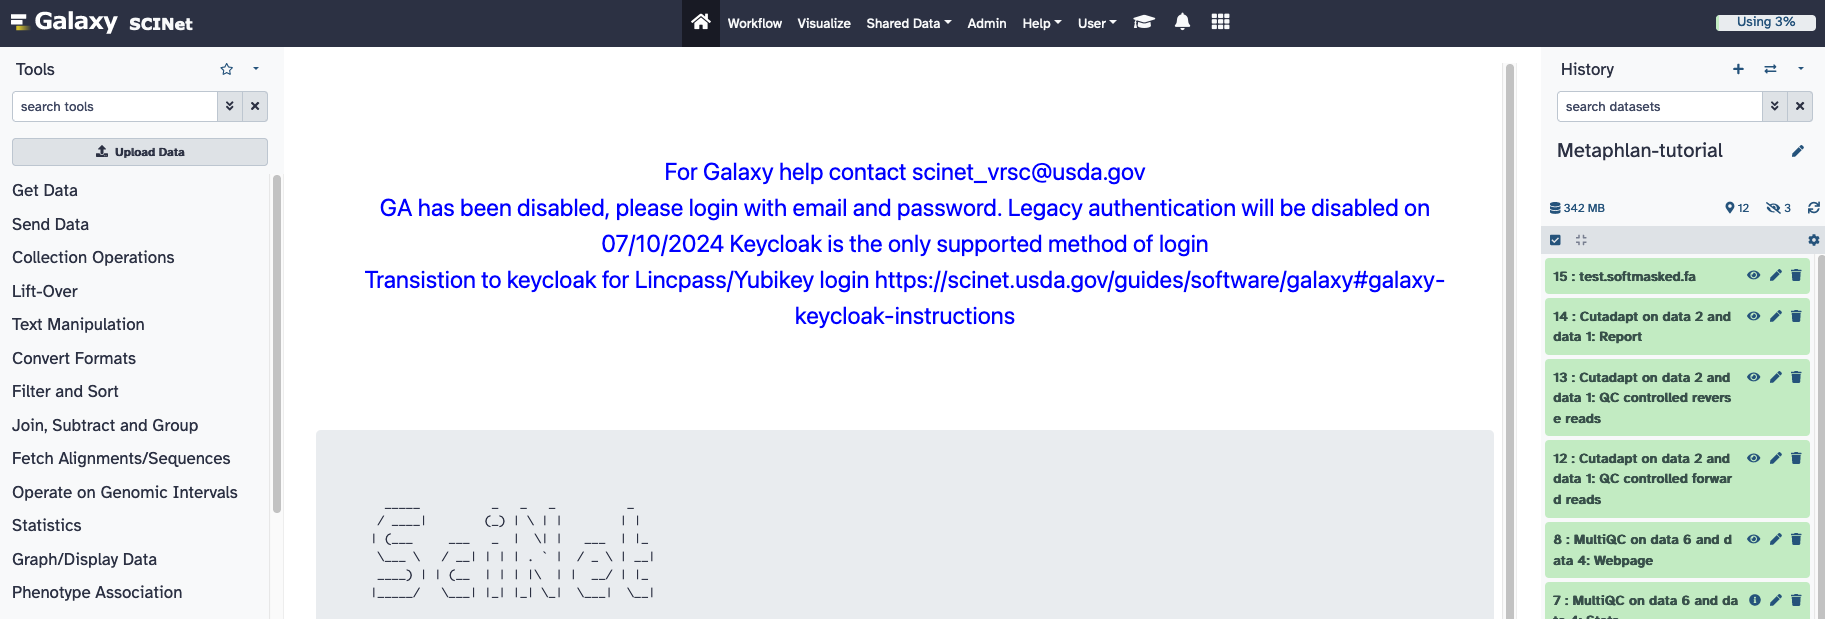
The “Tools” bar in the left window frame is where you can load, manipulate, and analyze data. The central window frame is where you will see options and parameters programs that you will be running. The right “History” frame shows all the imported files and programs you have run. In order to begin, you need to upload data. Often data of general interest, such a genome sequences or annotations, are already available in Galaxy under the “Get Data” tab. More commonly, you will be using data that you have generated.
You will import files into Galaxy by clicking on the “Tools” sub-heading “Get Data” and then “Upload File” under “Get Data”. The following download/upload screen should appear:
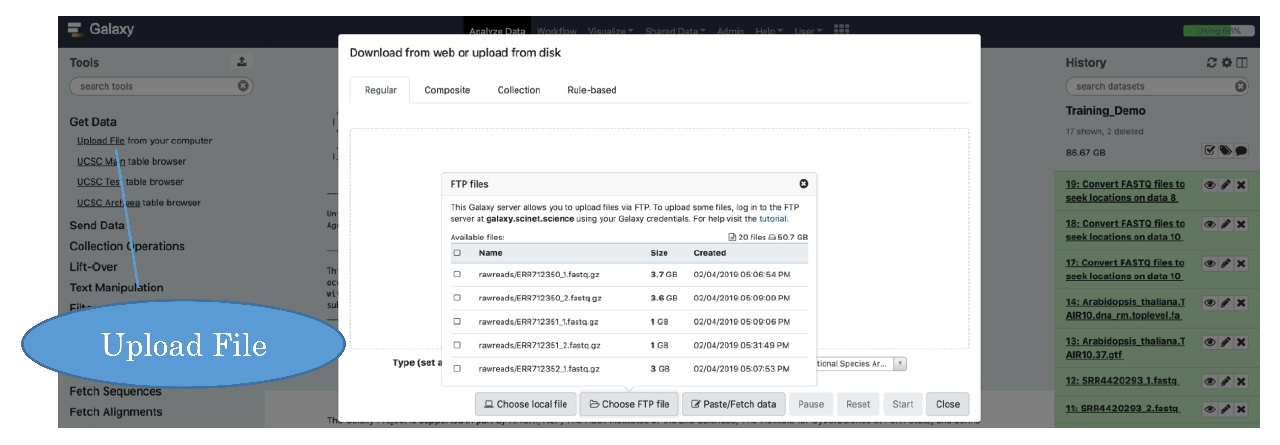
Galaxy offers a method to import data directly from your computer as “Choose local file” button. Feel free to experiment with this direct method, but we find it can be slower than FTP transfer. To that end, we will mainly focus on uploading files using a file transfer program, such as Globus. If you click on “Choose FTP file”, Galaxy will look in your FTP upload folder in your home directory on Ceres ~/galaxy for files you have uploaded, so you must first upload your data to that folder.
Importing data to Galaxy
You need to move or copy your data files to the Galaxy folder in your home directory and then you will be able to upload/import the files using Galaxy. Remember, the default quota in Galaxy is only 100 GB. Please contact us to increase your default quota.
We recommend using Globus to move files to your Galaxy folder on Ceres. For instructions please see the Transferring Files Guide.
NOTE: If you already have data on Ceres, simply copy files into your Galaxy folder on Ceres either via command-line (cp command). These files will appear as if you had uploaded them via FTP and can be imported using the approach described below.
IMPORTANT NOTE: Make sure when transfering files to consider how the files are being transfered, i.e. using cp or mv. Moving (mv) instead of copying(cp) will REMOVE the original files so it is recommended to use cp or review how you want your files to be handled before moving.
Once your data files are in your Galaxy folder in your home directory on Ceres, go back to the “Upload File” screen and click “Choose remote files”. You will see the download/upload screen with a list of your files:
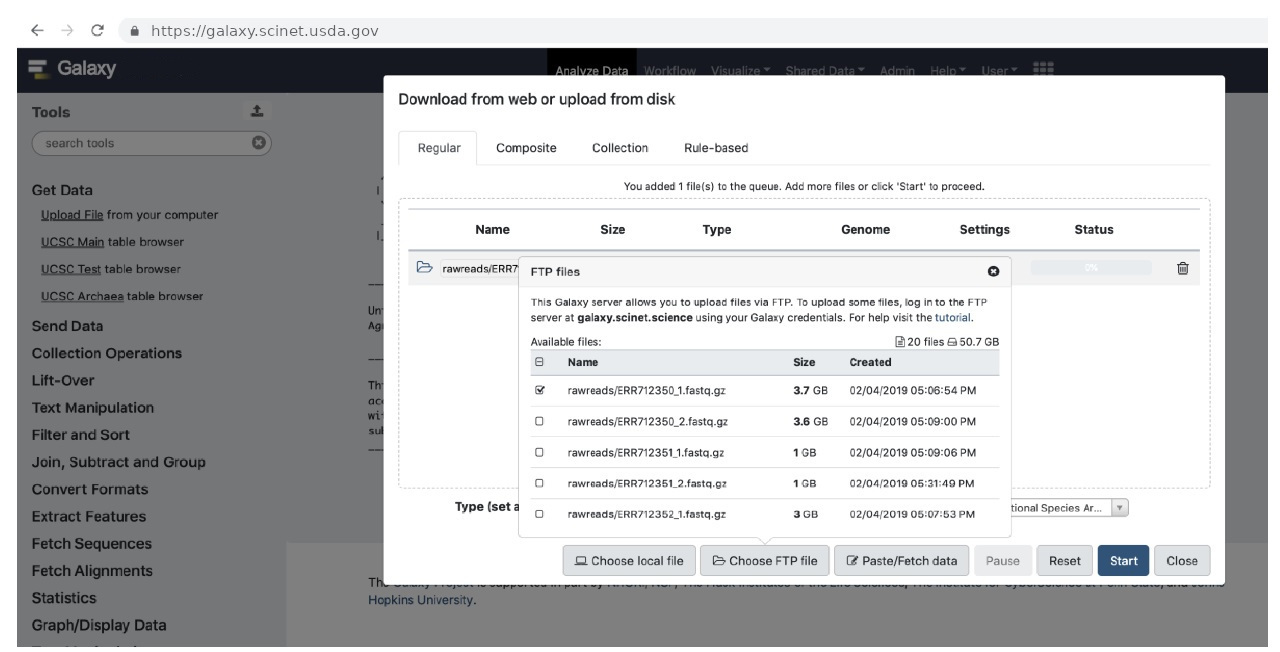
Select the file you want to import and hit “Start”.
NOTE: Importing the data into galaxy will REMOVE the file that you moved via FTP.
NOTE: Uploading directly from disk is slower than the other methods of tranferring.
You can close this window and the file will appear in the History pane on the right of your home screen:
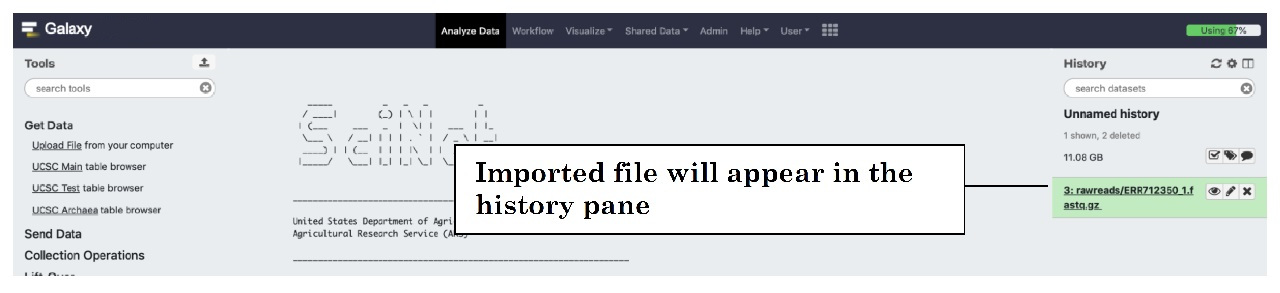
This is a generic way to import files and can be used regardless of file format. You are now ready to process your data.
Using Galaxy
There are hundreds of tutorials and videos to introduce you to the Galaxy framework, which is essentially the same no matter where it is installed. We suggest that you start at https://galaxyproject.org/learn/. A nice interactive introduction is also available at Help > Interactive Tours, or https://galaxy.scinet.usda.gov/tours.
You will usually want to structure your data into Collections for batch processing and downstream analysis. See https://galaxyproject.org/tutorials/collections/ or, for a worked example, https://depot.galaxyproject.org/hub/attachments/documents/presentations/gcc2014/Chilton.pdf. Alternatively, most tools will allow you to run the same process on multiple datasets of the same format without combining them as Collections.
Some links to common analyses are given below. Many of these analyses already exist as published workflows and can be used directly. See https://usegalaxy.org/workflow/list_published for a searchable list. To use, download the workflow of interest, click on the “Workflow” tab at the top of your main screen, and then import the workflow according to the instructions. An example of usage is available here: http://sepsis-omics.github.io/tutorials/modules/workflows/. For those wanting to develop their own workflows, a graphic editor is available, as described here: https://galaxyproject.org/tutorials/g101/#opening-workflow-editor.
RNA-seq – general overview (https://galaxyproject.org/tutorials/rb_rnaseq/) and galaxy specific pipeline (https://galaxyproject.org/tutorials/nt_rnaseq). Also check out https://sites.google.com/site/princetonhtseq/tutorials/rna-seq.
SNP-calling – https://galaxyproject.org/tutorials/var_dip/ for diploid genomes and https://galaxyproject.org/tutorials/var_hap/ for haploid genomes.
IMPORTANT: If you receive the job error “This job was terminated because it ran longer than the maximum allowed job run time” it means that the tool has not been appropriately configured to run on Ceres using the scale of data that you have provided. Please contact scinet_vrsc@usda.gov and we can optimize these parameters for you and for future users.
Sharing Your data and analysis
If you need some consultation on your results or on parameter settings, it can be very useful to share your analysis with someone so that you can both be viewing the same thing. To that end, we will give this aspect special emphasis. You can see a short introduction to this option at https://galaxyproject.org/learn/share.
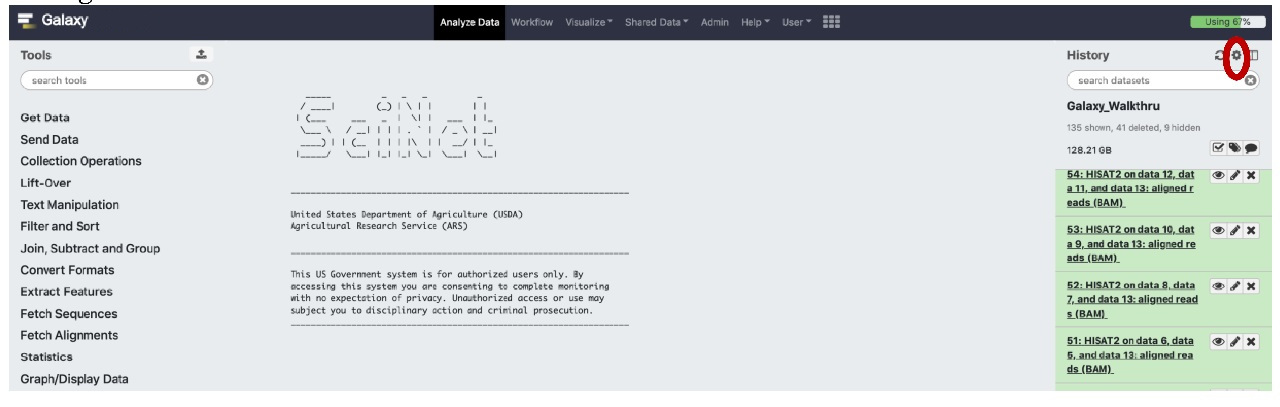
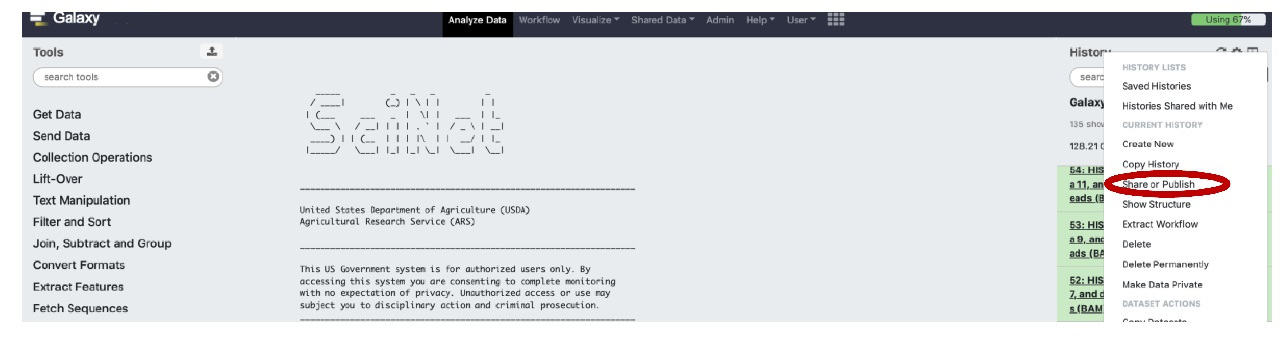
Briefly, if you are in the appropriate history, follow the clicks on the History pane indicated in red (select Settings gear icon, then select “Share or Publish” on the settings menu):
You will see the “Share or Publsish History Galaxy_Walkthru” screen:
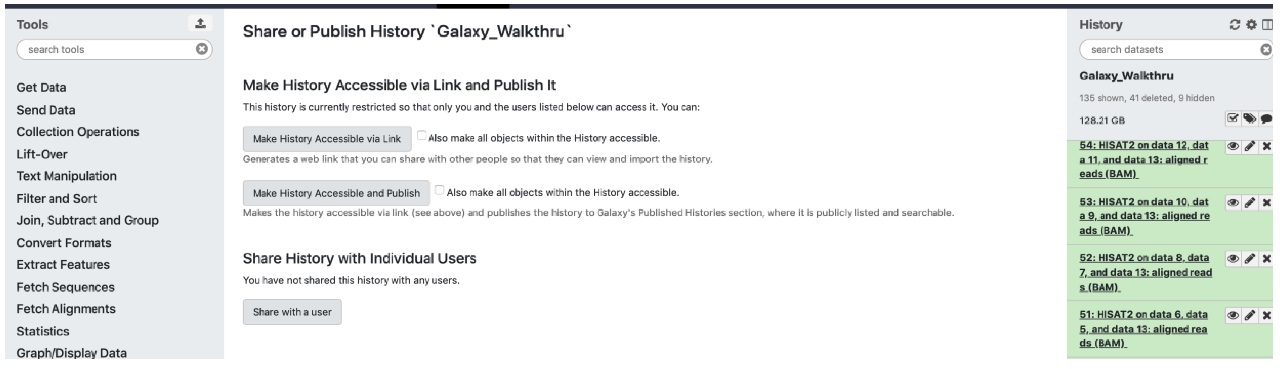
You can manually enter the username you wish to share with in the drop-down space. Be careful that the username is exact and appropriate capitalization is observed.
After you have gone through these steps, the person you have shared your history with will need to go to the same gear icon used above but instead click on “Histories Shared With Me”. The shared history should be present on the resultant interface.
Can’t find a tool you need?
We have loaded a core subset of all tools that are available on the public Galaxy server (https://usegalaxy.org). If you do not see a tool you need and cannot use a good alternative, you should search in the Toolshed (https://toolshed.g2.bx.psu.edu). After identifying the relevant tool, email a Ceres Galaxy administrator: scinet_vrsc@usda.gov. If there are multiple options, we encourage the use of tools developed by either “devteam” or “iuc”. Depending on the nature of the tool you are requesting, we may ask you to supply a sample dataset for testing purposes, so anticipate having that data available.
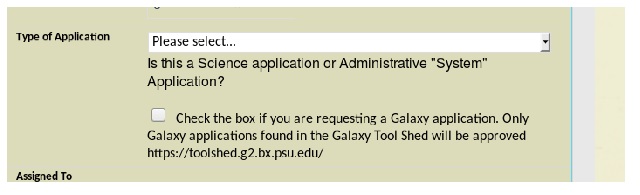
Additionally, there is an option for galaxy install as well on the application to request software installation by the VRSC. Select the Galaxy checkbox in the “Type of Application” section: