
Best Practices
- Globus Online is the recommended method for transferring data to or among Ceres, Atlas, and Juno. It provides faster data transfer speeds compared to scp, has a graphical interface, and does not require authentication for every file transfer.
- Given the space and access limitations of a home directory, large amounts of data or data that will be used collaboratively should be transferred to a project directory. See the User Manual section Storage Quotas for more information on home and project directory quotas.
- If you have to transfer very large amounts of data or if network speed at your location is slow, please submit a request to the Virtual Research Support Core (VRSC) to ingress data from a hard drive as described below (section Large Data Transfer by Shipping Hard Drives).
- If you have issues with transferring data, please contact the VRSC at scinet_vrsc@USDA.GOV.
Globus Data Transfer
Globus Online is the recommended method for transferring data to or among Ceres, Atlas, and Juno. It provides faster data transfer speeds compared to scp, has a graphical interface, and does not require authentication for every file transfer. To transfer data to or from a local computer, users will need to install Globus Connect Personal which does NOT require admin privileges.
The instructional video demonstrates how to transfer files using Globus as well as how to authenticate with LincPass or Login.gov.
Login
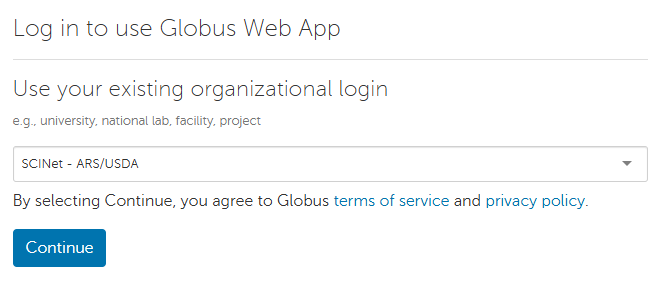
- In a browser, navigate to https://www.globus.org/, click ‘Log In’ in the upper right corner.
- Select ‘SCINet - ARS/USDA’ in the existing organizational login dropdown menu to use your SCINet credentials to log in
- You should now be on the Globus ‘File Manager’ page. You should see two panels. If you don’t, click on the 2-panels icon at the top right of the screen. You should now see two panels:

Copying Data
- The two panes represent the two systems that you want to copy data between. You will need to select a Collection (an Endpoint) for each pane and most likely, authenticate.
- Click in the ‘Collection’ box on one of the panes. A selection window will appear. Recent collections will be listed under recent tab. Click on other tabs to see collections that you’ve bookmarked, created or got from other people. In the Recent tab you will also see “Install Globus Connect Personal” button. See below how to install Globus Connect Personal on your computer to transfer data to/from this computer.
- If you see your desired collection, click it and continue. If you do not see your desired collection start typing the name in the box at the top. When your collection appears, select it.
- If authentication is required for the selected collection, required fields or other instructions will appear.
- Type or select “SCINet-Ceres” for Ceres DTN, “SCINet-Atlas” for Atlas DTN or “SCINet-Juno” for Juno. You will be prompted to authenticate.
- You will authenticate with either your LincPass or Login.gov. For more information, see the GUI Login Instructions.
- To transfer data between Ceres and Atlas clusters, log into Ceres DTN in one pane and to Atlas DTN in the other pane. Similarly, to transfer data to/from Juno, log into NAL TN 0 in one of the panels.
- Once you have logged in on both panes you will need to navigate to the data you want to copy in one pane (source pane) and navigate to the location you want it copied to on the other pane (destination pane). You can either click on directory names or type the full path in the Path box (under the Collection box).
- If you are attempting to access 90 Day Data on Atlas, you will use the following path: /project/90daydata/yourprojectname. If you do not include /project/, you will receieve an error.
- Before you start your copy, look at the Transfer & Sync Options at the bottom of the page (click on arrow to see available options). To see a short description of each option click on “i” next to the option.
- The top suggested option to select before starting your transfers are:
- preserve source file modification times
- skip files on source with errors
- Fail on quota errors
- We also recommend “Do NOT verify file integrity after transfer” which approximately doubles the effective transfer speed.
- To start the transfer click the blue box with the arrow at the bottom of the page pointing in the direction of the destination pane.
- You may now click ‘Activity’ at the left to see a list of current and prior transfers. Click on “File Manager” at the top left of the page to get back to the main page.
Globus Connect Personal
To transfer files to your personal computer you may use Globus Connect Personal. A link “Install Globus Connect Personal” can be found in the Recent tab and in the “More Options” tab in the list of Collections. Click on “Collection” box to get to the list.
The installation instructions for Globus Connect Personal are available here:
By default, Globus Connect Personal prompts to be installed in C: \Program Files which requires administrator rights. However you don’t need Administrator rights to install Globus Connect Personal on your local machine. If you do not have Administrator rights browse to a place you have write access to (e.g. your Desktop folder) or contact your local IT staff for assistance.
SCINet Café Machine Installation Instructions for Globus Connect Personal
Please Note: The Café machine may be slow right after login, don’t worry if you are met with a black screen for an extended period of time.
Step One:
- Log in to the machine using your SCINET username (first.last) and your LincPass/PIN.
- When you get to the start screen, you should see icons along the bottom for Firefox, files (cabinet), and terminal. If you don’t see this, go to ‘activities’ in the upper left of the screen and it will toggle from the full window so you can access this dock.
Step Two:
- Run the command
globusconnectin a terminal.-
Please Note: This is a script that automates installing, setting up and running globuspersonalconnect. If you would rather run globuspersonalconnect without the extra assistance, please feel free to do so.
-
The first time you run
globuconnectit will download, install, and start the setup process for Globus Connect Personal. -
The setup process usually, but not always, requires you to login (this process may vary depending on how you login).
-
- A globus login popup window will open. Select Log In. Go to the main Firefox window that opens behind the popup and select Allow. You will get a window asking you to login, select SCINET-ARS/USDA from the dropdown instead of ORCID and complete the eauth login.
- If the system does not automatically open a browser window for you, you can simply copy and past the link that will appear in the terminal session into the browswer to continue the process.
-
IMPORTANT: If you haven’t used Globus before, click continue. Otherwise, select ‘link to’ to join your existing Globus account to this one.
-
When registering, type ‘SCINet - ARS/USDA’ as your organization and non-profit research. Select agree to terms and click continue.
-
The next page will ask you to agree to setup and asks for a name for future reference. It is recommednded to keep the default (it should be the name of your SCINet café). Click allow.
- You will then see a window for ‘Collection Details’ – give it a name that will make sense to you.
- For example: your-initials and scinet-café ( ABC_scinet_cafe). A description is not necessary. Do not select the ‘high assurance’ button. Click save.
- You should get a ‘setup successful’ popup with the name of your collection. Click exit setup.
- If you have a collection name that is generic like ‘scinet_cafe’ you can click ‘show collection details’. On the right of the collection details page, select ‘edit attributes’ which will allow you to edit the collection’s name. If you are happy with it, click exit setup.
- On runs after the initial setup, it will scan for USB devices and then add any that it finds to the globus config and start the server.
- You can use “globusconnect -help” to see this info later.
- If you need to add USB devices after starting the server just run “globusconnect -restart” to rescan devices and restart the server.
If you would like to see a video demonstration of the above instructions, click here
Small Data Transfer Using scp and rsync
scp is usually available on any Linux or MacOS machine, and on Microsoft Windows 10 (in PowerShell). It’s best used when you need to transfer a single file.
Below are examples of scp commands to be issued on your local machine. In these examples
<local_path_to_file/>can be omitted, in this case current directory on your local machine will be used<remote_path_to_file/>can be omitted, in this case home directory on Ceres or Atlas will be useddest.extcan be omitted, in this case the name of the file being transferred will be used.
Transfer To Ceres:
scp <local_path_to_file/>file.ext <SCINetID>@ceres-dtn.scinet.usda.gov:<remote_path_to_file/>dest.ext
Transfer To Atlas:
scp <local_path_to_file/>file.ext <SCINetID>@atlas-dtn.hpc.msstate.edu:<remote_path_to_file/>dest.ext
Transfer From Ceres:
scp <SCINetID>@ceres-dtn.scinet.usda.gov:<remote_path_to_file/>file.ext <local_path_to_file/>dest.ext
Transfer From Atlas:
scp <SCINetID>@atlas-dtn.hpc.msstate.edu:<remote_path_to_file/>file.ext <local_path_to_file/>dest.ext
It is not advised to use “scp -r” command to transfer directories to Ceres, since the setgid bit on directories at destination is not inherited.
This is not a problem if directories are copied to /home/$USER but is a problem when copying to /project area and may result in access issues for other group members.
If you decide to use scp to transfer directories to /project, you will have to manually set a setgid bit on the directory and all subdirectories after the transfer using “chmod g+s <dir_name>” command. The following command will set ownership of the files in a directory in /project to the project group and set the setgid bit:
find /project/<project_name>/<dir> -exec chgrp proj-<project_name> {} + -a -type d -exec chmod g+s {} +
To learn more about scp command and all available options issue “man scp”.
Instead of scp one can use rsync command for bulk transfers. rsync synchronizes files and directories from one location to another while minimizing data transfer as only the outdated or inexistent elements are transferred. It is installed by default on macOS and is available on many Linux hosts. The following command will recursively transfer all new and updated files in the directory <dir_name> on the local machine into directory /project/<project_name>/<dir_name> on Ceres:
rsync -avz --no-p --no-g <dir_name> <SCINetID>@ceres-dtn.scinet.usda.gov:/project/<project_name>
To learn more about rsync command and all available options issue “man rsync”.
Large Data Transfer by Shipping Hard Drives
Large data transfers will be facilitated by the VRSC and involves users shipping hard disk drives (not thumb drives) with their data on it to the VRSC in Ames, Iowa. The VRSC will then upload the data directly and put it in a project directory specified by the user.
You can send hard drives containing data to the VRSC if you have very large amounts of data (typically greater than 50GB) to transfer to Ceres or if the network speed at your location is slow. Please follow these instructions:
-
Submit an email request to the VRSC scinet_vrsc@USDA.GOV for a data transfer with the following information:
- Amount of data
- Target project directory.
- Type of filesystem the data is coming from (Window, Mac, Linux)
If you don’t already have a project directory please request one first: Request Project Storage (eAuthentication required)
VRSC will review request and get back with further instructions.
-
Upon approval by VRSC, copy the data onto a SATA hard drive or SSD
- You will be responsible for purchasing your own drive(s)
- Any type of hard drive (not a USB drive) is fine but SSDs will be more tolerant of the postal system
- Disks must be EXT4, NTFS, HFS, XFS, or FAT formatted
-
Ship the disk to the address provided by VRSC and email the tracking information to scinet_vrsc@USDA.GOV. Include a print out of your email containing the data transfer request to VRSC in your package.
-
Once we receive the data we will copy it over to the appropriate project directory and notify you once it is complete.
-
Please include a prepaid return shipping label so that we can send the drive(s) back to you after the data transfer is complete. Otherwise the drive(s) will not be returned.
Other Ways to Transfer Data
Another supported GUI method for smaller file transfers is Cyberduck (https://cyberduck.io/). Cyberduck supports multiple protocols (including Amazon S3, iRODS, and Google Drive) and is compatible with the new phishing resistant authentication methods (i.e. SmallStepCLI).
Please Note: Programs such as WinSCP and FileZilla are not currently supported with the new phishing resistant authentication methods and will not work.
Using Cyberduck
To transfer files to and from the clusters using Cyberduck
- Download Cyberduck from https://cyberduck.io/ and install it.
- This may require local IT assistance if you are on a USDA managed machine.
- SSH into SCINet via the command line.
- This authentication is valid for 16 hours
- Open Cyberduck
- Click “Open Connection” in the menu bar.
- In the “Open Connection” window that appears, enter the following information:
- Protocol:
SFTP (SSH File Transfer Protocol) - Server:
ceres-dtn.scinet.usda.govfor accessing Ceres oratlas-dtn.hpc.msstate.edufor accessing Atlas - Username: Your SCINet user name
- Password: Leave blank! You have already authenticated with SmallStepCLI in step 2.
- Protocol:
- Click the “Connect” button.
- You may receive a warning about an “Unknown Fingerprint.” If you do, click “Allow.”
- To upload a file:
- In Cyberduck, navigate to the remote directory you want to upload the file to.
- Click the upload button from the main toolbar.
- From the file browser that opens, select the file you want to upload from your local computer and click “Choose.”
- To download a file:
- In Cyberduck, navigate to the remote directory where the file is stored.
- Right click on the file you want to downlad.
- From the context menu that opens, select “Download.”
Data Transfer to NCBI
To transfer data to/from NCBI, ssh to a DTN node and use either ncftp commands (ncftpput, ncftpget) or Aspera command (ascp). Since ftp connections can be unstable we recommend using Aspera for large file transfers.
To use Aspera, you will need a private key file that you can acquire by following instructions listed on Page 3 of the document at https://www.ncbi.nlm.nih.gov/books/NBK242625