
If you are at an ARS research location with a SCINet-X connection, you have access to a SCINet café machine - a dedicated computer for high-speed data transfer to and from SCINet’s supercomputers and long-term storage system. However, you do not need to use the café machine to use SCINet’s computing systems - computing work should be done from your regular workstation or laptop. Please note that using the café machines requires a LincPass.
Logging into a café machine
- Log in to the café machine using your SCINet username and LincPass/PIN.
(The login screen should look like a desktop login. If you see a terminal instead, contact the VRSC at scinet_vrsc@usda.gov for assistance.) - The café machine may show an extended black screen right after logging in, but this is expected. When you get to the start screen, you should see icons along the bottom including Firefox, files (cabinet), and terminal (black box with “>_” in white). If you do not see these icons, click on “Activities” in the upper left corner of the screen to make them visible.
Setting up Globus Connect Personal (GCP)
The recommended way to perform large file transfers to and from SCINet infrastructure is using Globus, and doing that from a local computer, including a SCINet café machine, first requires installing Globus Connect Personal (GCP). Instructions for installing and setting up GCP on a café machine are below, and this is a one-time setup done for each user on the café machine. (For installing GCP on other local computers, please see these instructions).
- After logging in to the café machine, open a terminal by clicking the terminal icon on the bottom of the screen.
-
Run the command “globusconnect” in the terminal to initiate a script that automates installing, setting up, and running Globus Connect Personal.
globusconnectThe first time you run the
globusconnectscript, it will download, install, and start the setup process for GCP. - A Globus Connect Personal Setup pop-up window will appear. Click “Log In”.
- Go to the main Firefox window that opens behind the pop-up and click “Allow”.
- On the log in page, select “SCINet-ARS/USDA” from the dropdown menu, click “Continue”, and complete the eAuth login procedure.
- If this is your first time authenticating Globus via your SCINet account, you will see a welcome page:
- If you already have a Globus account with another authentication identity (e.g., via ORCID or a university), click “Link to an existing account” to join your SCINet/USDA-ARS Globus identity to your existing account. (You can also link identities later using the steps on the Globus linking account instructions.)
- Otherwise, click “Continue” to register your SCINet account with a new Globus account. When registering, type “USDA-ARS” as your organization and select the “non-profit research or educational purposes” option. Agree to the terms and click “Continue”.
- If this is your first time authenticating Globus via your SCINet account, you will see a welcome page:
- The next page will ask you to agree to set up GCP and ask for a name for this consent for future reference. You can keep the default value which should be the name of your SCINet café machine. Click “Allow”.
- Now a pop-up window for “Collection Details” will appear. For “Collection Name”, provide a unique name that will be recognizable to you as the café machine. For example: your initials and “_scinet_cafe” (e.g., ABC_scinet_cafe). Providing a description is optional. Do not select the “High Assurance” checkbox (read about sensitive data on SCINet infrastructure here). Click “Save”.
- You should get a “Setup Successful!” pop-up with the name of your collection.
- If you would like to modify your collection name, you can click “show collection details” and, on the right of the collection details page, click “edit attributes” to edit the collection’s name.
- When you are happy with the collection name, click “Exit Setup”.
Transferring Data
To begin transferring data using GCP on the café machine, connect an external drive to the machine. At minimum, the external drive should support the USB 3.0 standard to ensure sufficient data throughput. Bitlocker-encrypted external drives can be accessed on the café machine using software called “dislocker”. Please do not copy any files onto the café machine as it has limited hard drive space.
-
If GCP is not currently running, open a terminal and run the following command to scan for external drives, to open the GCP connection interface, and to start the GCP connection with access to the found external drives:
globusconnect -
If GCP was already running before connecting the external drive, run the following command to restart the GCP connection and to rescan for the external drive:
globusconnect -restart
Now that your GCP connection is running and can access your external drive, you can go to Globus.org to perform data transfers from or to the café machine. You should find the “*_scinet_cafe” collection made above in your list of collections, and you will be able to connect to it while the local GCP connection is running on the café machine. After selecting your café machine collection, you should see in the Globus File Manager the files you have on the café machine or external drive. For detailed instructions on transferring data using Globus, see Globus Data Transfer.
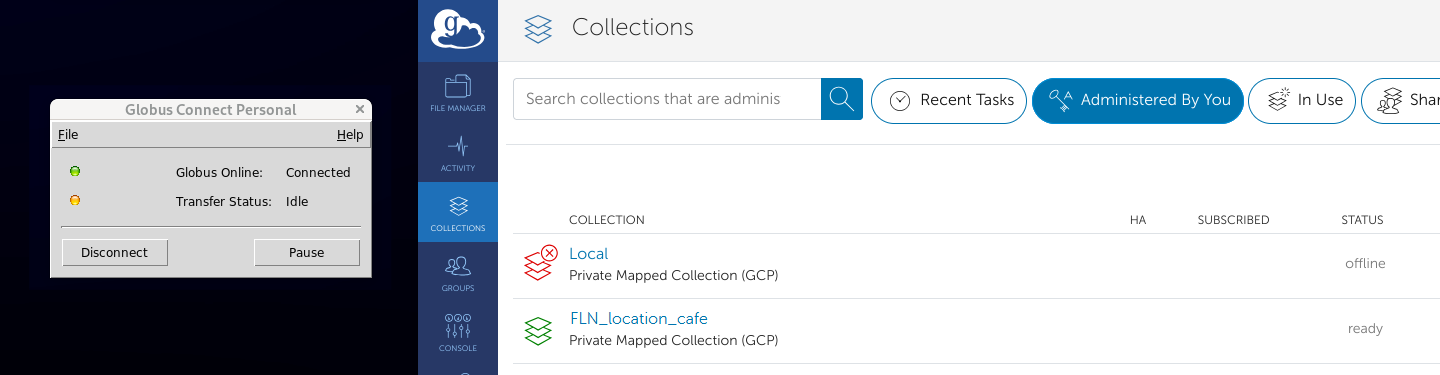
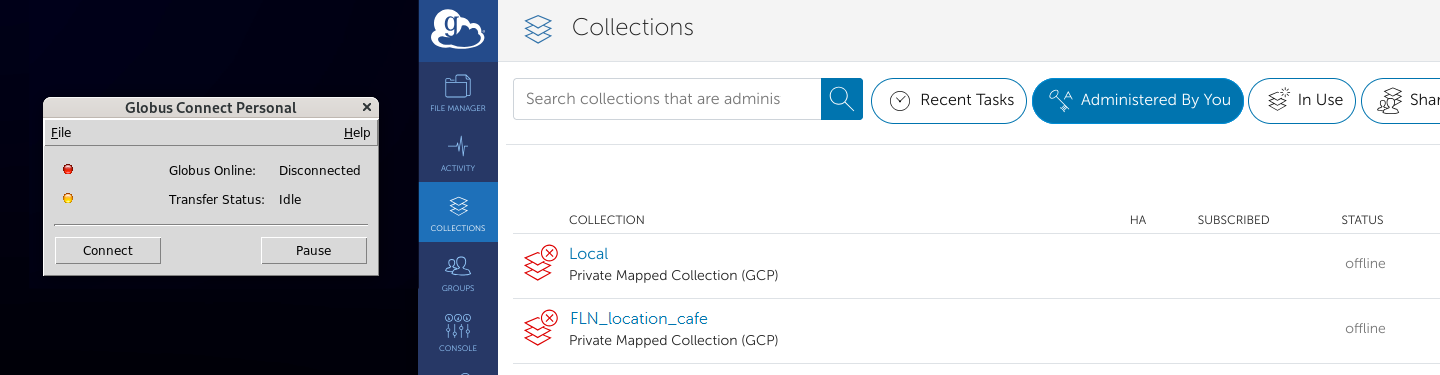
On the café machine, you can use the GCP window to disconnect your session (or reconnect after disconnecting). When you are finished transferring data, you can close the window or hit CTRL+C in the terminal to end your session. When you stop the GCP connection, it will no longer be accessible to you. Please stop the connection after each session.
You can use globusconnect -help on the café machine for additional information. If you run into any issues using the café machine, please contact the VRSC by emailing scinet_vrsc@usda.gov.